Well I have finally had time to have a go with my parchment craft kit.
Actually I started shortly after I got it, and discovered that tracing with a mapping pen is not so easy. In fact I did such a bad job first time around, that I got out my – as yet unused – calligraphy pens and inks to practice using the pen. I have now got several copies of the easiest design on bits of paper in in orange ink.
Today I decided I was just going to take a punt at it and have another go on the parchment.
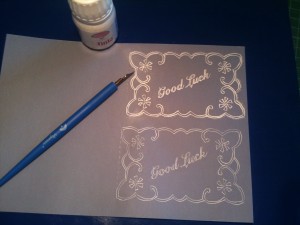
The top is the first tracing, with the bottom being about a week after practising with the pen and ink.
After practising I was much more comfortable with the pen and so managed to get much finer lines. Still not even close to perfect so I can see alot more practice in my future. However there is a definate improvement between the two.
What I learned about the tracing – Tracing with a mapping pen is not too hard as long as you understand how the ink will flow out of the nib. Also a very light touch is required.
While I was in the grove I went ahead and tried the embossing.
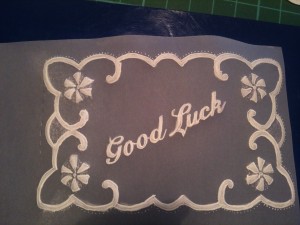
After embossing the tracing does not look so bad.
First attempt. It was easier that I thought it was going to be.
Next attempt. I also had a go at a little stippling in the sides.
What I learned – the larger the ball on the tool the easier it is, but the smaller balls are still needed to make sure you are right up to the line. The smaller the ball the easier to push a little too hard and crack the parchment, and yes you can push too hard with the larger ball too.
Now in case you are wondering, the kit only came with one ball tool, but because of other crafts I have done over the years I had a few different sizes here to experiment with.
This has been a fantastic learning experience, and I am looking forward to trying the next example in the kit. My plan is to work my way through the kit as a practice and learning experience, from there I will need to invest more money if I decide to persue this new aspect of papercrafting.


