Happy Birthday to my Hubby

It is that time again. Bevans birthday.

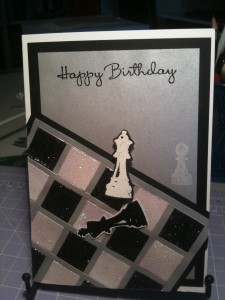
This year I went to the craft shop especially to get a chess pieces punch to make his card out of. When we checked the punches they were all sticking and on closer inspection the pieces were actually quite small.

I decided to get a chess stamp instead, and the lady told me that it was cheaper to buy the card kit which contained the stamp, than to just get the stamp by itself. Go figure.

A friend of mine gave some some black glittery embossing powder, which is kind of like the black version of iridescent Ice embossing powder. So I used both of these and then covered them with glossy accents to make the chess board tiles.

The two chess pieces were just embossed with plain black and white on the opposite colour paper, and the little stamped pawn is stamped with whisper white onto glossy silver card stock.

Bevan is a chess geek so I know he will be happy with this, and surprised as I haven’t yet told him I bought a chess stamp.

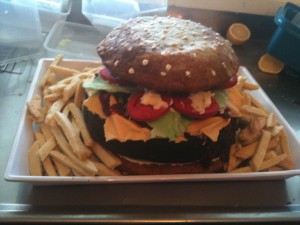
He also loves his burgers and fries, so I decided to make his cake as a burger and fries.

With Bevan’s favourite cake being banana, that is what the bun is made out of with chocolate cake for the patty. The lettuce and cheese is coloured moulded white chocolate, and the dressing is just butter icing.The tomato sauce was raspberry gel icing and the fries and tomatoes were butter cookies.

It looked great and everyone who saw it loved it.

Posted in Card Making, Uncategorized | Tagged | Leave a comment

Sad but needed

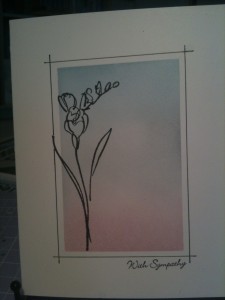
I have had the unfortunate need to make a sympathy card as my uncle has lost his battle with cancer. I find these very hard to make as they need to be very simple and tasteful, and I am always sad when I have to make them.

I decided to use a very old stamp set, which is also the first stamp set I ever bought it is called Echos of Kindness, and keep the colours very simple.

Although there are many things I could add to this card, I feel that the occasion calls for it to be left just how it is.

Unfortunately I have also just heard that a close friends father has been given only two weeks, so I guess I will be making another one of these.

Posted in Card Making | Tagged | Leave a comment

In the Spirit Of Christmas

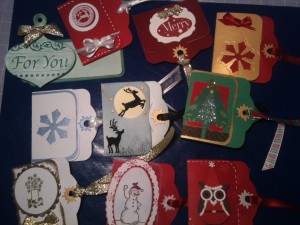
With the christmas cards completed and most of the christmas shopping done, I have been wrapping the gifts nice and early. Of course that means that I also need to put tags on them, I have been back at the craft table making an assortment to christmas gift tags to add to the gifts.

I have made several and after having put some on gifts I thought I might get a picture of some of them to show you.

They are nice and colourful and christmassy, and they make me happy. As you can see there is a good range and even though they are only little, I still have to stretch my creativity while I design them.

Posted in Card Making | Tagged | Leave a comment

Christmas Card 2012

In keeping with last year, I made just one card, but 50 copies of it for this year. I think I like this idea for a christmas card as then I have no problem with trying to remember what I sent to people, so no danger of sending them the same one two years in a row.

This year I was late starting as I had a bit of trouble coming up with a design. I really wanted to use the Christmas Stocking Stamp and punch that I got last year. I had used them on some tags but wanted to convert them to a card. Alas whatever I tried just did not gel for me, so I had to can that idea and start from scratch.


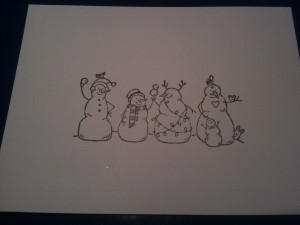
Stampin Up came out with there new christmas mini catalogue and in it was a really lovely snowman stamp. It was cute that I had to order it.

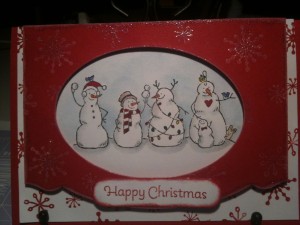
So this was the image I decided to build my card around.


I stamped the image with black Stazon ink and then did a little colouring just with markers and blender pen and ink. I also sponged the sky with some Bashful Blue ink, but when I was finished the image still looked a bit flat. To get around this I grabbed my Stormy Sky distress ink and used a blender pen to put some shadowing in. This was the perfect blue/grey shade and just finished the image off perfectly.

I cut out the red overlay and stamped snowflakes on it with Whisper White craft ink and then embossed with Iridescent Ice embossing powder. It doesn’t really show up in the picture, but I love that it looks like icicles around the edge where I sponged it. The red snowflakes on the white layer are just stamped with Real Red ink, that was enough for them. The sentiment tab is sponged in the red and then versamark and edged with the same embossing powder.

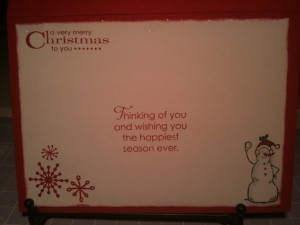
The inside of the card also has some Real Red sponged around it followed by versamark and more of the Iridescent Ice embossing powder just around the edge. It adds just a nice little bit of sparkle without being too much.

I love the two verses split apart like this allowing for us to write inbetween. The same snowflakes were also stamped on the envelopes.

The best thing is that I have managed to get all 50 cards completed before the end of October, so I feel like I am on track for christmas.

Posted in Card Making | Tagged , , | Leave a comment

More Parchment Practise

In the middle of making my christmas cards, I needed to wait for my stamps to arrive. While I was waiting I decided to have another go with my parchment starter kit.

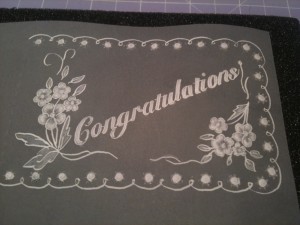
Onto tag number two. I still think that the tracing is the hardest part, but overall it came out much better than the first one. Last time I needed a week of practice before I could trace the pattern even halfway good enough to emboss.

Still needing more practice, and it is certainly a style that can’t be rushed. I managed to avoid putting any holes in this one, in fact I could almost get away with cutting it out and making the tag properly. Maybe the nest one I will turn into a card.

Overall I think I am happy with this for a second attempt at something completely new.

Posted in Parchment | Tagged , | Leave a comment

Magic Card

For some time I have been wanting to make a magic card, but it has never formed in my head – until now.

Amandas birthday card was a bit of a challenge but I am hoping I have come up with something she will like.

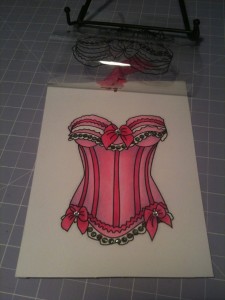
First off I found this image at paperprintables.com and coloured with copic markers.

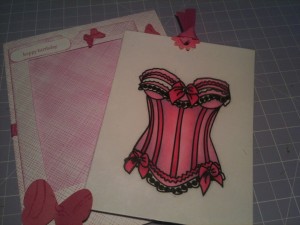
This is the base image in my first try at a magic card. I used RV2 and RV4 to colour this corset, and since they are the only RV copics I have at the moment I had to use C0 and C1 to try and get the shading. I do not know if that was the best way to do it, but as a novice copic colourer I am happy enough with it. As you can see from the folded bit at the top, the image was also printed on clear plastic so that it would overlay exactly.

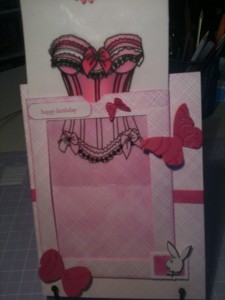
I still wanted to make this like a normal opening card, so the part that the insert will go into is mounted on the card front, instead of as a stand alone card in itself. The netting background stamp is from Hero Arts.

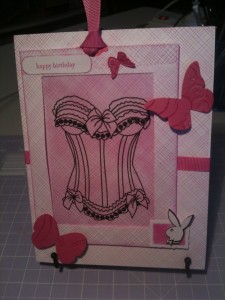
As the insert slides in the colour on the corset disappears. I think this adds the element of surprise to the whole card, which is deliberately made to look a bit bland until you take the insert out.

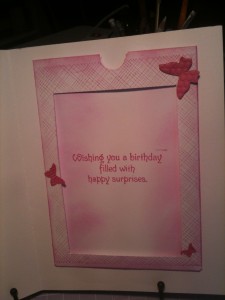
The front of the card is done on white cardstock and stamped and sponged with Stampin Up Passion Pink ink. the butterflies are from Stampin Up Beautiful Wings and the old butterfly punch also from Stampin Up.

The inside of the card is done in the same style. We will be putting a pressie card in here, and I wanted a place to put it so it would not just fall out. It is also quite tall so I needed to think about it for a bit. In the end I made the same sort of pocket and attached it to the lining of the card, which had a slit in the bottom. the pressie card can slide in the back and go right through to the layer between the lining and the base of the card. This allows enough room for the whole thing to fit in nice and stay level with the top of the pouch. There is also room to write in the card.


Posted in Card Making | Leave a comment

Test Run on Alcohol Markers

Sometimes it is frustrating to live in New Zealand and not be able to get a lot of the stuff you see on the different websites. Alcohol markers fall into this category.

Copic markers have only been here for a short time, and we can only get the ciao markers here, which of course means that most of the colours are still unavailable to us. On top of that they are very expensive and there has been talk of price increases coming soon. This is bad news for someone like me, with a limited budget and still at the beginning of my copic collection.

I decided to look around as some of the other brands and see if something would feel like a fit for me. After much search in the web I decided to try out the Spectrum Noir markers to see it I liked them. I went into it with a very open mind as reviews had some people loving them and others saying they would rather stay with their copics as they did not like the Specrum Noir markers at all.

So I took the plunge and invested my birthday money into three packs of markers. Now my first comparison between copics and Spectrum Noirs. I do like the way the packs give you six blendable pens right off the bat. However I can see how this could be frustrating for someone who just wanted one or two shades because they have a lot of other alcohol markers already. For me with not too many copics this was not an issue so I am happy to buy the packs, it takes the guess work out of which colours to by.I think down the line a bit further I may be frustrated about having to buy the reinkers in packs. but right now it is not an issue.

On the other hand with the copics I get the shades I want for the a particular project and then I have them, the packs didn””t work for me so I prefer to buy my copics as individual pens. I cannot get he reinkers here, but I can send them in to get them refilled if I need to. The advantage there is if I do not use a marker much then I never have to get it refilled. The disadvantage is that I have to send them away, so I would be looking a week without that marker if I ever have to refill them.

Moving on I ordered the markers online on Sunday, and they arrived yesterday(Wednesday), so that was not too bad for mail order. I ordered three packs, the essentials, the pale hues and the warm greys. I didn””t buy colours that I already had in the copics, instead filling in some gaps that I wanted.
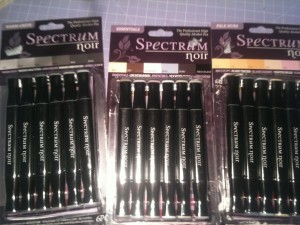
It is always exciting to get new things, and these markers were no exception. I am not going to go into the obvious differences between the two brands as there is a lot of that information out there already, What is important is the whole colouring/blending thing, after all that is why we use alcohol markers in the first place.
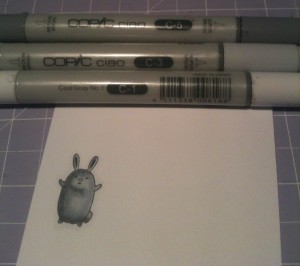
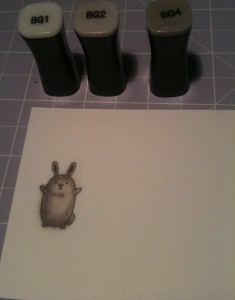
I stamped the same image on the same card stock and used c1, c3, and c5 in the copic markers on one image then BG1, BG2 and BG4 in the Spectrum Noir. These are both greys but one is a cool grey and the other is a warm grey. Both images were given a shadow outline using the c0 copic marker since this is something I often do with my images anyway.
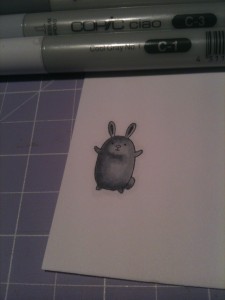
So first off, I will say that the different markers do require slightly different techniques due to the differences in there nibs. I have had more practice with my copics, but I am still very much a beginner with all the alcohol markers so there is a lot of room for improvement. I will also say that the image is used is quite small being only about and inch high.
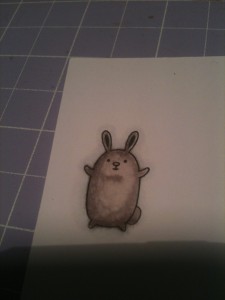
I managed to get both images to blend although I seemed to have to spend more time with the copics to get the blending to happen. The Spectrum Noir markers are quite wet so when you layer the shades they almost blend themselves, the down side to this is that you have to be careful at the edges because it may bleed a bit. I did not have any trouble with the copics bleeding, but I had to work a lot harder get the blending happening. I also did have a play with some browns and combining both brands, and it seemed to work just fine. I just had to make sure that I had colour shades close to each other.

My personal opinion is that if you have already invested a lot of money into copics and are happy with your images, you might as well stick to them as you will not gain anything with the other markers. If on the other hand you are new to alcohol markers and do not have a large disposable budget, then certainly at half the price per marker, the Spectrum Noir will do the job with no bigger of a learning curve.

So what will I do now that I have some of each. Well because of the problems getting the copics colours, I plan to continue to use both. Because of the price, I will over time get the rest of the Spectrum Noir markers and then I can fill in my shadings with the copics. Since I can use both together I think this will give me many more options that just using one brand. Of course I might have a different answer if I had been able to choose between all of the copic colours.

Posted in Uncategorized | Tagged , , | Leave a comment

Through the Telescope

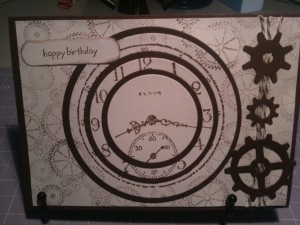
I have seen a few telescope cards recently and I always think how nice they look. I do not really have any stamps suitable for this style of card so I just made it up.

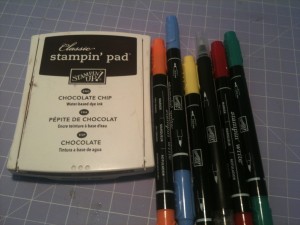
I used Stampin Ups retired set Sense of Time and stamped the clock and the background with chocolate chip ink. Then I cut is out and matted it with chocolate chip paper. Two of the cogs are from Tim Holts and the other one is from the old cog punch.

Since we may be posting this card I decided not to pop the layers up, although I think the whole thing would look better if I did.

Posted in Card Making | Leave a comment

Stella in an Easel Card

I had to make a very special card for my friend Maureens birthday. She is always giving me such a hard time whenever I have a birthday because she is 11 months older than me. She is always saying that for one month we are the same age and I am now old. So she had to have a Stella card.

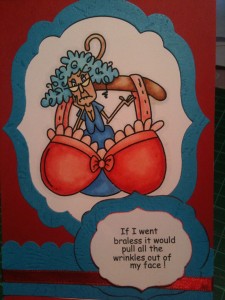
I know she will get a laugh out of this. I found this image at Bugaboostamps.com. When I first looked at it and read the sentiment I laughed so hard that I knew it was the right stamp to use.

Stella and her bra are coloured with Copic markers B000, B00, B02, B12, B23, B24, B32, E21, E31, E37, E41, E53, R000, R20, R22, R27.

Not a colour combination I would normally use, but for this image it seemed to work

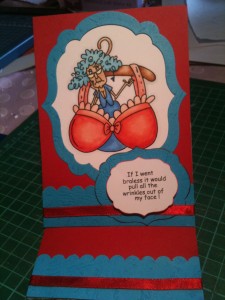
I made this into an easel card for something different to do. I also added the stamp that Maureen gave me for my birthday on the back of the card.

The little witch is Stella again from Bugaboo Stamps. She is so cute as a witch and not too scary. I might even colour her in before I send the card off.

Posted in Card Making | Tagged | Leave a comment

Lets try Parchment Craft

Well I have finally had time to have a go with my parchment craft kit.

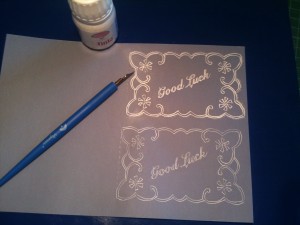
Actually I started shortly after I got it, and discovered that tracing with a mapping pen is not so easy. In fact I did such a bad job first time around, that I got out my – as yet unused – calligraphy pens and inks to practice using the pen. I have now got several copies of the easiest design on bits of paper in in orange ink.

Today I decided I was just going to take a punt at it and have another go on the parchment.

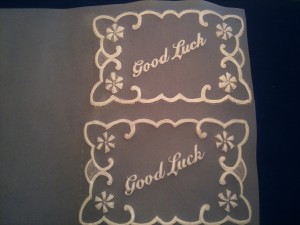
The top is the first tracing, with the bottom being about a week after practising with the pen and ink.

After practising I was much more comfortable with the pen and so managed to get much finer lines. Still not even close to perfect so I can see alot more practice in my future. However there is a definate improvement between the two.

What I learned about  the tracing – Tracing with a mapping pen is not too hard as long as you understand how the ink will flow out of the nib. Also a very light touch is required.

While I was in the grove I went ahead and tried the embossing.

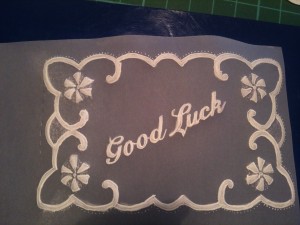
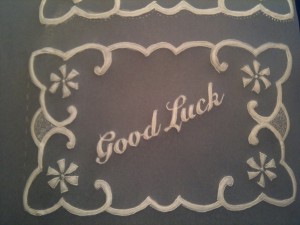
After embossing the tracing does not look so bad.

First attempt. It was easier that I thought it was going to be.

Next attempt. I also had a go at a little stippling in the sides.

What I learned – the larger the ball on the tool the easier it is, but the smaller balls are still needed to make sure you are right up to the line. The smaller the ball the easier to push a little too hard and crack the parchment, and yes you can push too hard with the larger ball too.

Now in case you are wondering, the kit only came with one ball tool, but because of other crafts I have done over the years I had a few different sizes here to experiment with.

This has been a fantastic learning experience, and I am looking forward to trying the next example in the kit. My plan is to work my way through the kit as a practice and learning experience, from there I will need to invest more money if I decide to persue this new aspect of papercrafting.

Posted in Card Making, Parchment | Tagged , | Leave a comment